
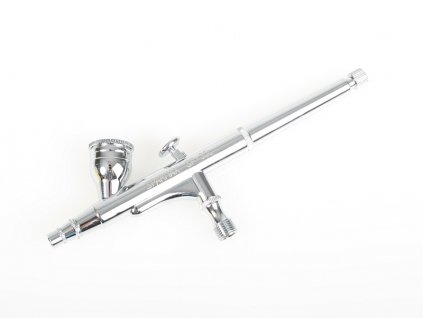
Bittydesign Revolver Airbrush spray gun with 0.3/0.5/0.8mm nozzle
Code: KAVAN-BDAIR-116B22


Related products


Product detailed description
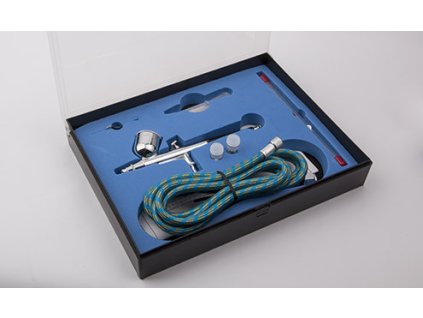
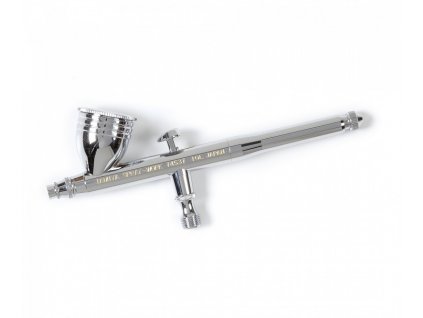
Precise double-action spray gun / airbrush suitable for everyday use with a comfortable handle. It is great for spraying large, medium and small areas. Ideal for RC models, automotive graphics, plastic models, body art, cake design, cosmetic applications, model railways and much more.
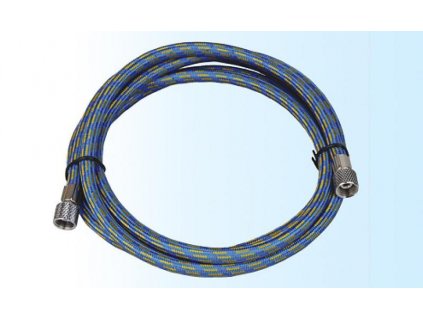
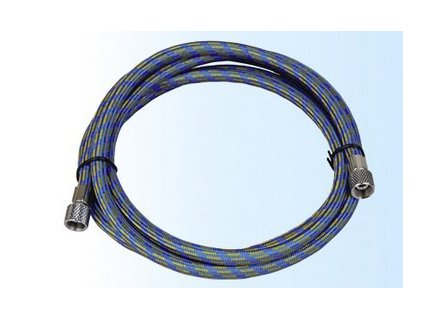
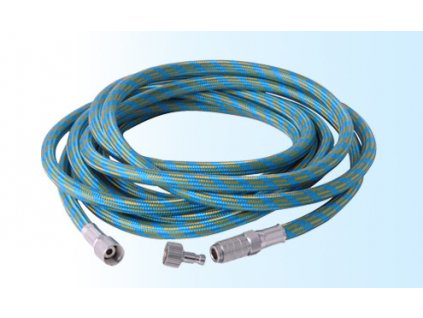
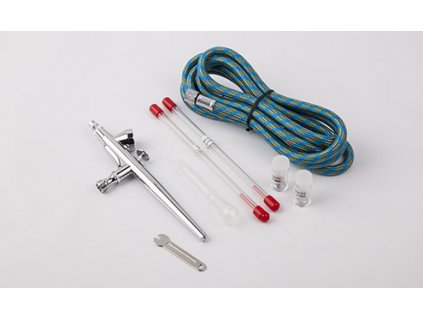
The set contains spare nozzles in different sizes that you can replace as needed (0.3, 0.5 and 0.8 mm). It also includes a 1.8m hose with a 1/8~1/4" reduction, spare needles and paint containers of various sizes.
How to use: Connect all the parts and fill the paint container. Press the trigger to spray the desired surface. By adjusting the screw in the back of the gun, it is possible to change the size of the spray, and with the adjusting screw, which is in front of the trigger, it is possible to adjust the size of the air outlet.
Diluting the paint: The paint should be very thin, that's the only way to spray it. It is necessary to try the dilution and spraying before starting work. The dilution ratio also affects the adhesion of the paint and its covering ability. Different brands and types of paint require different dilutions.
Air source - compressor: The working pressure of spray guns varies between 0.8-2.7 bar, depending on the type of gun and the job. The compressor must have continuous pressure regulation and a separation filter to trap dirt and water vapor. Some compressors for airbrush have a pressure vessel (air tank), which serves for the most uniform air pressure at the output.
Spray gun operation
Try spraying on a piece of paper or a practice object. Make sure the hose connecting the compressor to the gun is well sealed. Fill the container with paint. At the beginning of spraying, first set the gun to a fine stream of paint and start spraying about 15 cm from the surface. Hold the gun at right angles to the surface. While spraying, make a smooth movement of your hand from side to side, never stand with the gun in one place. Guide the gun evenly along the surface and cover a continuous area. If you get closer to the surface, the painted area will be smaller and the color will be more concentrated. If you move the gun away, the painted area will be larger and the color will be less concentrated. After gaining practice, you can try spraying fine lines. While doing this, hold the gun just above the surface and carefully control the amount of paint. In this spray mode, the tip of the needle protrudes from the spray head. Be very careful not to catch it on the surface. The tip of the needle is sensitive, it could bend.
Cleaning and Maintenance: In order for the gun to work well for a long time, you must always clean it thoroughly, but very carefully. The two principles for a good working spray gun are cleaning and general care. When working with several shades of paint, it is not always necessary to completely clean the gun. It is usually enough to rinse with a smaller amount of thinner and continue working immediately. Thorough cleaning is only necessary after the work has been completed.
Regular cleaning:
-Fill the gun container with a special liquid cleaner. Water is not effective in this case, even if you worked with water-thinned paints. Cleaner - Unlike ordinary thinner, Airbrush Cleaner also dissolves dried paint residues inside the gun. Use a brush or brush to clean all surfaces inside the gun. Then pour out the cleaner with the rest of the paint.
-Refill the container with cleaner and spray it into the collection container (it can be used again). For a moment, you can also carefully (watch out for the tip of the needle) plug the spray head with your finger so that bubbles start to form in the gun container. This will clean the channels in the gun better.Repeat the process until the gun is completely clean.
Thorough cleaning:
-Unscrew the rear part of the gun body, unscrew the needle lock nut. Carefully withdraw the needle. If there is paint residue on it and the needle does not come out easily, carefully pinch it with pliers and slowly pull it out in a twisting motion. Clean the needle carefully with a soft cloth. Pay close attention to the tip of the needle. If you manage to bend the tip of the needle, press it against a flat surface (glass) and roll it a few times with your fingertip.
- After removing the needle, unscrew the parts of the spray head and clean them from the paint residues on the inner surfaces.
-Cleaning the nozzle is as sensitive an operation as cleaning the needle. You usually clean the screw nozzle without removing it from the gun. In a new gun, the nozzle is sealed on the thread with wax from the factory, and unscrewing it will break the seal and there is a risk of damage to the nozzle. Sometimes it is convenient to heat the nozzle carefully to loosen the wax. If you want to replace the nozzle with another one, you should be extremely careful when unscrewing the nozzle. In newer types of guns, the nozzle is sealed with a rubber gasket, in which case unscrewing is easier. You can easily release the VEGA type nozzle from the bed by pressing your finger on the side of the nozzle. Then clean the nozzle bed as well.
Note: Each nozzle is subject to wear and tear depending on the type of paint used. Paint is abrasive and the nozzle will wear out sooner or later with use.
-Cleaning the trigger mechanism and the back of the gun is necessary in case of heavy contamination. In normal operation, you only need to completely disassemble the gun once in a while when you feel that the overall operation of the gun is impaired.
- When assembling the spray gun, proceed in the reverse order. First assemble the spray head (finger tighten the threads carefully so you don't pull them!), then continue with the trigger and needle bed assembly. Then insert the needle and push it gently with your finger until it stops. As soon as you feel resistance, stop pressing on the needle and tighten the locking nut. Be very careful when pushing the needle so as not to tear the nozzle!
-Rubber seals may change size when in contact with cleaner. However, after cleaning, they regain their original shape in about 15 minutes.
-If you are not going to use the gun for a long time, you can preserve it with fine oil.
The product warranty is 24 months from the date of sale.It does not apply to operational wear and tear of the product and to damage caused by improper handling, improper use, or neglected maintenance.
Additional parameters
| Category: | Airbrush guns |
|---|---|
| Warranty: | 2 years |
| EAN: | 0785104942318 |
| ? Configuration: | Double action |


Be the first who will post an article to this item!
 Značka striekacích pištolí a príslušenstva pre airbrush.